

How to Install a Waterproof Cable Joint Kit Correctly






 2026-09-22 15:09:13
View:389
2026-09-22 15:09:13
View:389Installing a Waterproof Cable Joint Kit correctly involves preparing cables by stripping insulation, positioning the gel-filled connector body over the main cable without cutting it, inserting branch cables into designated ports, ensuring proper contact with conductors, and securing all seals to achieve IP68-rated protection. The entire process eliminates the need for main cable cutting or length reservations, streamlining branch connections in pump rooms, underground garages, and buried installations while maintaining code compliance and long-term reliability.


Step-by-Step Installation Guide for Waterproof Cable Joint Kits
Using the right fitting method is what makes a Waterproof Cable Joint Kit work as well as it can. Code compliance, working safety, and long-term dependability are all ensured by following structured procedures.
Preparation and Safety Measures
Turn off the power to all the circuits that will be used for installation before you start. Make sure the circuits are completely dead by using the right testing equipment. Gather the tools you'll need, such as cable strippers made for the right cable sizes, insulation removal tools, heat guns (for heat-shrink jobs), crimping tools (if needed), and safety gear for yourself. Carefully read the manufacturer's installation directions, as each product has its own unique needs.
When the Waterproof Cable Joint Kit is delivered, check to make sure that all of the parts are there and not broken. Make sure that the kit's specs match the power and connection sizes you need. The T-GJFZ-70/16 model works with main cables up to 70 mm and branch cables up to 16 mm. It is rated for 0.6/1kV systems, which means it can be used for most low-voltage distribution tasks in business and industry.
Cable Preparation Process
Clean the surface of the wire where the connection is made very well, getting rid of any dirt, oil, or other things that could make the closing less effective. When using pierce-through connections instead of standard splicing methods, you don't have to cut through wires on the main cable or remove parts of cable insulation. This ability to keep the cable's continuity is one of the best things about installing it in the field.
For branch cables, remove the outer jacket and insulation to the sizes given in the installation guide. Usually, you need to leave 8 to 12 mm of bare conductor exposed, but the exact lengths depend on the form of the connection. When stripping, don't cut or score the conductor strands because damaged conductors make connections with high resistance and could cause failure points.
Component Positioning and Assembly
Place the body of the connector where you want the branch to go along the main cable run. You can choose any spot along the cable route, which lets you make the best installation based on where the equipment is located and any structural issues that come up during building. This ability to change is very helpful when problems come up that weren't planned for or when tools needs to be moved around while the job is being done.
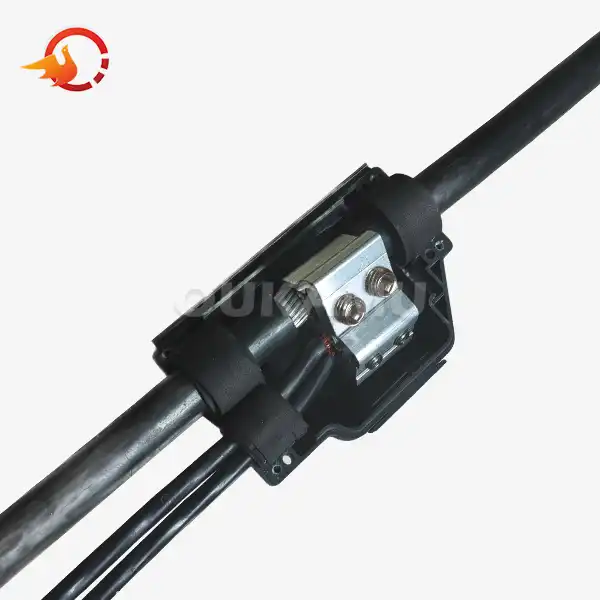
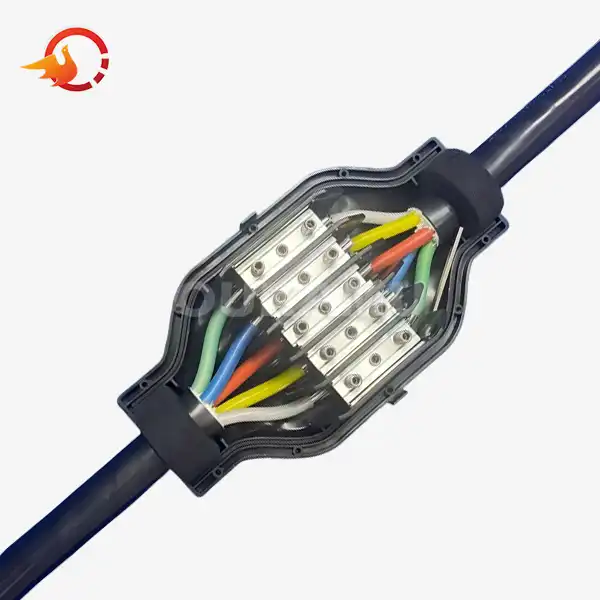
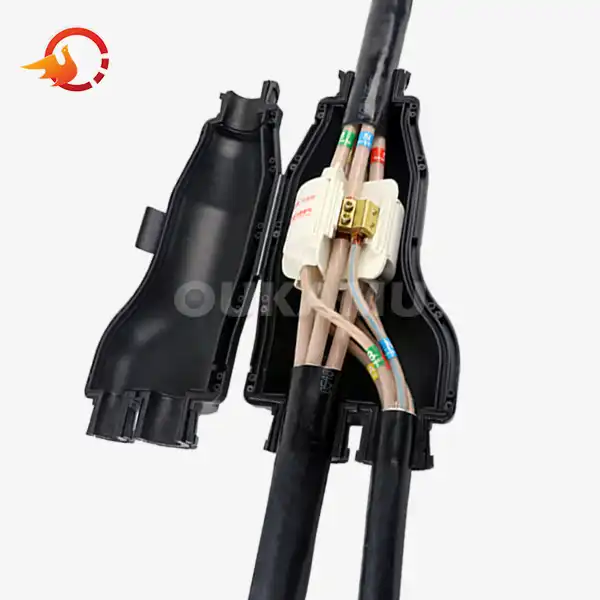
Open the housing of the connection and insert the main wire into the opening that is marked. You don't have to strip or cut the main wire in order for the internal piercing device to make an electrical connection. Place the ready branch cable into its designated port, making sure that the exposed conductor touches the gel-filled chamber's contact area. Most designs have visual or physical cues to make sure the correct entry depth is being used.


Sealing and Final Assembly
Make sure that all of the latching devices are fully engaged before closing the connector box. Many new designs use colour-coded indicators that change how they look when they're properly closed. This makes it easy to see that the assembly is correct. When the lid is closed, the built-in sealing gel flows around the conductors and fills in any gaps inside. This makes a complete barrier against moisture.
If your kit comes with external heat-shrink parts, use a heat gun to spread the heat evenly, working from the middle outward to avoid trapping air bubbles. When the wire shrinks, it releases layers of glue inside that stick to the jacket, adding another layer of protection. GB/T 14048.7-2016 sets the standards for testing, and properly placed Waterproof Cable Joint Kits should be able to survive immersion testing and insulation resistance verification.
Testing and Verification
Once the assembly is done, look over it to make sure all the parts are in the right place and there are no holes in the protection housing. Insulation resistance testing should be done between the wires and between each line and ground before turning the power on. For new installs, readings that are higher than 100 megohms are usually fine, but the exact standards rely on the system voltage and the codes that apply. For maintenance records, write down where the installation took place, the cable specifications, and the test results. Good paperwork is very helpful when fixing problems or making changes to the system in the future.
Comparing Waterproof Cable Joint Kits: Choosing the Best Fit for Your Needs
To choose the right Waterproof Cable Joint Kits, you need to know the differences between the technologies that are out there and match the product's features to the needs of the application.
Heat Shrink vs. Cold Shrink vs. Gel-Filled Systems
Table 1: Comparison of Cable Joint Technologies
| Technology Type | Installation Time | Skill Level Required | Environmental Protection | Cost Range |
|---|---|---|---|---|
| Heat Lessen | 15 to 25 minutes | Moderate | Great when put correctly | |
| Cold Shrink | 10 to 15 minutes | Not very bad | Very Good | $ |
| Pierce-Through Gel-Filled | 5 to 10 minutes | Low | Very good, with an IP68 rating | $ |
| Tape wrapping the old way | 20 to 30 minutes | High | Changeable, gets worse over time | $ |
When put properly, heat shrink systems seal very well, but you need to be careful not to overheat the cables or make holes in the sealant. It takes longer and requires more skill to install than other ways. With cold shrink technology, you don't need a heat gun because the rubber parts are already stretched and then shrink when their cores are taken out. These kits usually cost more, but they are easier to put together.
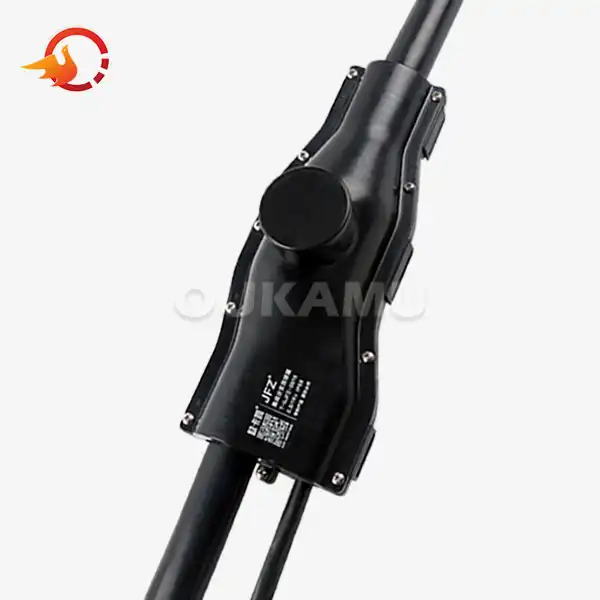
Gel-filled pierce-through connectors, like the Oukamu T-GJFZ-70/16, are easy to install and offer full protection. There is no need to worry about trapped air or partial sealing because the gel instantly moulds to the shape of the wire and the conductor surfaces. Installation takes very little time and doesn't need any special heating tools. This cuts down on both the cost of labour and the chance of making mistakes during installation.
Key Selection Criteria for Procurement Managers
- Rating for voltage and certification compliance: Make sure that the Waterproof Cable Joint Kit voltage grade meets the needs of your system and leaves enough room for error. With a value of 0.6/1kV, the T-GJFZ-70/16 model works with most low-voltage industrial and business distribution lines. Check that the goods you want to buy have the right approvals, like the CCC mark for the Chinese market or the UL listing for use in North America.
- Cable Sizes That Work Together: Check to make sure that the connector fits the size of your cable. Most branch cable connectors list both the main cable size range and the branch cable size range. The T-GJFZ-70/16 can handle main cables from 25mm² to 70mm² and branch cables from 2.5mm² to 16mm². This makes it suitable for common distribution needs in businesses, apartment buildings, hospitals, and schools.
- Features of the Installation Environment: Check out the weather and environmental factors at installation areas. Underground parking spaces are exposed to water, have temperature changes, and may come into touch with chemicals from car fluids. In pump rooms, there is a lot of air, and water can get in when equipment breaks down. Choose goods with the right IP ratings (IP68 for underwater uses) and materials that can handle the chemicals that will likely be present. For outdoor installs that are above ground, UV-resistant materials are necessary. The T-GJFZ-70/16, on the other hand, is intended to be installed in wells or directly buried.
- Cost of Owning Everything: Check out the total job costs, not just the original purchase price. Products that cut down on construction time save a lot of time and money on labour, which is especially important since pay for skilled electricians keep going up. Because branch connections can be made without cutting main cables, there is no waste of cable, and each connection point saves two to three meters of main cable. These material savings add up when spread out over dozens or hundreds of branch circuits in a big project.
Brand Considerations and Product Comparison
Internationally known names like 3M, TE Connectivity, and Panduit have been tested a lot and have a track record of stability around the world. Most of the time, these companies offer full technical support and product certifications for more than one market. Their goods, on the other hand, often come with high prices that have a big effect on project funds.
Manufacturers that focus on Waterproof Cable Joint Kit solutions, like Oukamu, which has 20 years of experience with branch cable connectors, offer targeted innovation at competitive prices. Because we're focusing on this one type of product, we're always improving how we put it, the materials we use, and the way we make it. The end products have similar performance but lower total costs, which makes them appealing to procurement managers who want to save money but still need reliable, code-compliant solutions.
In 2022, a big project to expand a hospital made these benefits very clear. At first, the electrical contractor wanted international brand connectors to be used in the building's utility vaults and underground parking structure. They tested and sampled Oukamu T-GJFZ-70/16 plugs on a single floor and found that installation time was 35% shorter while test results for insulation resistance and waterproof integrity stayed the same. The project changed its requirements, which cut the cost of electrical materials by 22% without affecting the quality or schedule.
Maintenance and Safety Tips for Long-Lasting Cable Joints
During their service life, even the strongest Waterproof Cable Joint Kits should be inspected regularly and safety rules should be followed at all times.
Establishing Inspection Routines
Plan to visually check available wire joints on a regular basis, especially in harsh settings where wear and tear happens more quickly. For most indoor uses, reviews every three months are enough. For outdoor or underground installations, checks should be done every month for the first year after installation, and then every three months once stable performance is proven.
During inspections, look for damage to the connector housings, signs of moisture getting in (like corrosion on metal surfaces that are exposed), discolouration of insulating materials, or deformation of the connector bodies. Any of these situations could mean that the protective barriers have been broken. Make sure that the connector housings stay closed and that all of the latching mechanisms are working. Closures can sometimes become loose over time because of vibrations from close machines or changes in temperature.
Cleaning and Environmental Management
Wipe down connecting housings with clean, dry cloths to get rid of dust and other particles that get into the air in industrial settings. Do not use acids or strong cleaners that could damage the materials in your home. If the Waterproof Cable Joint Kits are going to be put in places where chemicals will be present, make sure that the chemicals and the connector materials will be compatible. Most current flame-retardant materials can stand up to common industrial chemicals. However, materials that are exposed to strong acids or specific solvents may need extra protection.
Manage the draining in underground basements so that plugs that are rated IP68 don't get submerged for long periods of time. These products can handle being submerged in water, but keeping them out of water as much as possible increases their service life and lowers the risk of corrosion on any metal parts that are connected.
Safety Protocols and Personnel Training
Make sure that everyone who works near electrical installations knows basic electrical safety rules and knows that Waterproof Cable Joint Kit installations are energised equipment that needs the right safety measures. When working on or near wire connections, you must follow lock-out/tag-out processes. When testing or inspecting circuits that are said to be de-energised, they should still be treated as energised until the right testing equipment proves otherwise.
Installation crews should be trained on the products they will be putting in. Even though a lot of Waterproof Cable Joint Kit systems work in similar ways, each one has its own specific setup steps and pressure requirements. Installation mistakes that hurt long-term success can be avoided with the right training.
Procurement Guide: How to Buy Waterproof Cable Joint Kits Efficiently
Buying Waterproof Cable Joint Kits in a smart way has a big effect on both the costs and schedules of a project. Procurement managers can make better sourcing choices when they know about the benefits of buying in bulk, the options for customisation, and the factors used to evaluate suppliers.
Buying in bulk and keeping an inventory plan
For big projects with a lot of branch circuits, volume discounts can be used to cut unit costs by a large amount. If you're planning a business building or infrastructure project that needs dozens or hundreds of branch connections, it's better to buy in bulk than to place multiple orders for small amounts. Depending on the amount and the supplier's rules, buying in bulk usually gets you a price of 15% to 30%.
Compare the benefits of buying in bulk with the costs of keeping an inventory and the limited space for storage. When kept correctly, Waterproof Cable Joint Kits are very stable on shelves, but having too much product on hand can slow down cash flow. Work with suppliers to set up staged delivery schedules that work with the progress of the building. This way, you can get goods just in time for installation instead of having to store them for long periods of time.
Table 2: Sample Project Specifications and Requirements
| Project Type | Common Points of Branch | Main Size of Cable | Size of Branch Cable | Level of Stock Suggestion |
|---|---|---|---|---|
| Complex of homes (200 units) | 80 to 120 | 50–70 mm | 4–10 mm | 100 to 130 units |
| Building for business offices | 60 to 100 | 35–70mm | 2.5 to 16 mm | 80 to 110 units |
| Hospital Building | 150 to 250 | 50–95 mm | 6 to 16 mm | 180 to 280 units |
| Campus for education | 100–180 | 35–70mm | 4–10 mm | 120 to 200 units |
Customisation and Original Equipment Manufacturer (OEM) Services
Standard product specs work for most uses, but sometimes special solutions are needed because of the specifics of a project. OEM services are available from specialised manufacturers like Oukamu and are made to fit the needs of each project. When order numbers are high enough, custom Waterproof Cable Joint Kit size ranges, changed housing measurements for installations with limited room, or special material formulations for chemical exposures that aren't common can be met.
Talk about the options for customisation early on in the project planning process. It usually takes between 4 and 8 weeks for engineering, sample production, and testing of a custom product before full production starts. This deadline needs to be added to the general project plan.
Balancing Price and Performance
When you add up all the costs of a project, the lowest initial price is rarely the best deal. When evaluating providers, you should look at a lot of factors, such as the quality of their products, how reliable their deliveries are, and how good their customer service is after the sale. A slightly higher unit cost that comes with guarantyd delivery times and quick technical support is a better deal than rock-bottom prices from suppliers who aren't always available or who don't offer much support.
Before placing a big order, ask for samples of the Waterproof Cable Joint Kit to try. Hands-on testing lets your construction crews see how easy it is to set up, make sure it works with the wire types you use, and make sure the quality meets your standards. The cost of testing samples is very small compared to the cost of finding problems with a product after it has been bought.
Supplier Evaluation Criteria
- Certification and Proof of Compliance: Suppliers you can trust will gladly give you certification paperwork like test results, CCC certificates (if needed), and statements that your products meet relevant standards like GB/T 14048.7-2016. During project inspections and the final acceptance process, this paperwork is very important. No matter how much cheaper they are, you should stay away from suppliers who can't or won't provide full certification documentation.
- Dependable delivery and the ability to handle logistics: Construction plans depend on getting materials at the right time. Check out the logistics skills of potential suppliers, especially for projects with more than one location or places that aren't in big cities. Established sellers keep standard goods in stock so that orders can be filled quickly. For stock items, shipping usually takes between 3 and 5 working days. Check the mailing methods, tracking options, and quality of the packaging to make sure the items don't get damaged during travel.
- Help with technology and training: Beyond the products themselves, suppliers who offer installation training and ongoing technical support add a lot of value. Training classes help installation crews do a great job, which cuts down on mistakes and calls for more work. Having access to technical support makes it easier to fix strange problems or get answers to questions about specific applications during installation.
Conclusion
To properly install Waterproof Cable Joint Kits, you need to know about the parts of the product, follow systematic installation steps, and choose the right products for the job. Gel-filled pierce-through connections made today make installation easier and protect the environment better than older ways. Getting rid of the need to cut main cables cuts down on waste and installation time by a large amount. This helps mechanical and electrical contractors deal with rising labour costs.
Waterproof Cable Joint Kit procurement managers should consider the whole cost of ownership, not just the purchase price. They should consider manpower, material, and long-term reliability. Before buying in bulk, sample goods, check certification, and create connections with suppliers who can satisfy your needs. This facilitates project completion. These vital electrical connections will survive decades and perform dependably in underground parking garages, pump rooms, and hidden utility installations if properly installed and maintained.
FAQ
What makes a cable joint truly waterproof?
For waterproofing to really work, it needs more than one layer of protection to work together. The joint can handle being submerged in water for more than one metre without breaking. It has an IP68 rating, which means a Waterproof Cable Joint Kit is completely waterproof. Inside the connection body, gel-filled spaces make uniform barriers around the conductor contact points.
Can waterproof cable joints be installed without special tools?
The way a product is installed depends on its design. For traditional heat-shrink devices to work right, you need heat guns and special training. Modern gel-filled pierce-through connections like the T-GJFZ-70/16 make the process a lot easier; all you need are simple tools for getting the cables ready, like wire cutters and strippers. Because the design is merged, there is no need to use heat, put tape around it, or compress it to make it tight. Because it's easy to get to, regular electrical teams can do skilled work without having to buy expensive tools or go through long training programs.
How do I verify a cable joint is installed correctly?
Visual inspection and electrical testing are both necessary for proper verification. Visually check that all the housing parts are closed all the way, that all the latches are working and that there are no gaps in the assembly. Make sure that the covering parts keep in touch with the wire jackets and don't tear or move them. Before turning on the circuit, test the insulation resistance between the wires and from each line to ground. For low-voltage installations, readings should be higher than 100 megohms. For maintenance records, write down the test results along with the date and location of the installation.
Partner with Oukamu for Reliable Waterproof Cable Joint Solutions
When your project needs tried-and-true Waterproof Cable Joint Kit solutions that make installation easier while still meeting strict safety standards, Oukamu has the knowledge you need, based on 20 years of branch cable connector innovation. Our T-GJFZ-70/16 model has IP68 waterproofing and gel-filled double insulation, so you don't have to cut the main line and can move the branches around easily on-site. Executives in charge of buying things from electrical contractors all over North America like how we offer complete certification paperwork, reasonable prices, and quick technical support.
Email our team at info@okmbranchcable.com to talk about the needs of your particular project, get product samples, or look into bulk prices for your future installations. Visit okmbranchcable.com to look at all of our Waterproof Cable Joint Kit choices and find out why top contractors choose Oukamu as their main source of branch cable connectors.
References
1. Institute of Electrical and Electronics Engineers. (2021). Comparative Analysis of Cable Joint Sealing Technologies in Moisture-Prone Environments. IEEE Transactions on Power Delivery.
2. Standardization Administration of China. (2016). GB/T 14048.7-2016: Low-voltage switchgear and controlgear - Part 7: Ancillary equipment. Standards Press of China.
3. International Electrotechnical Commission. (2020). IEC 60529: Degrees of protection provided by enclosures (IP Code). IEC Publications.
4. National Electrical Contractors Association. (2022). Labor Cost Trends in Electrical Construction: 2022 Analysis. NECA Research.
5. Occupational Safety and Health Administration. (2023). Electrical Safety in the Workplace: Best Practices Guide. U.S. Department of Labor.
6. Building Services Research and Information Association. (2021). Cable Management Systems in Commercial Buildings: Performance and Reliability Study. BSRIA Technical Report.