


How to Use Cable Jointing Resin: Full Application Guide


 2025-07-01 07:19:41
View:389
2025-07-01 07:19:41
View:389Cable jointing resin is a crucial component in electrical installations, providing insulation, protection, and durability to cable connections. Whether you're a professional electrician or a DIY enthusiast, understanding how to use cable jointing resin correctly is essential for creating safe and reliable cable joints. This comprehensive guide will walk you through the process, offering expert tips and best practices to ensure successful applications.
Introducing Cable Jointing Resin and Its Importance
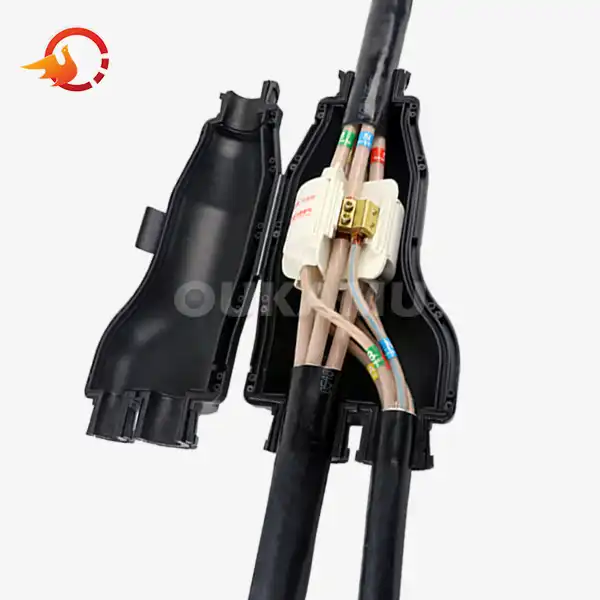
Cable jointing resin is a specialized epoxy compound designed to encapsulate and protect electrical connections. It serves several critical functions:
- Electrical insulation
- Moisture resistance
- Mechanical protection
- Temperature stability
- Chemical resistance
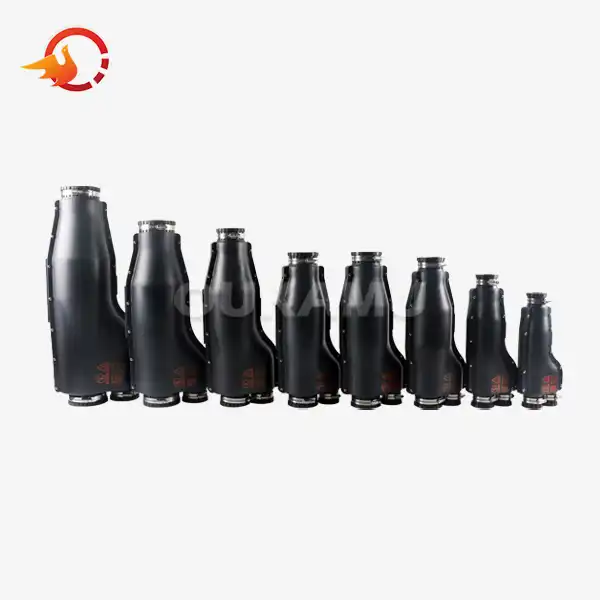
Using high-quality cable jointing resin, such as the products offered by Xi'an OUKAMU, ensures that your cable joints meet rigorous industry standards and perform exceptionally well in various conditions. The technical parameters of a superior cable jointing resin include:
- Voltage Drop: <3.2mV
- Withstand Voltage: 3.5kV, 5min, no breakdown
- Resistance Value: >500MΩ
- Protection Level: >IP65
Benefits of Using Cable Jointing Resin
Incorporating cable jointing resin into your electrical projects offers numerous advantages:
- Enhanced safety through superior insulation
- Increased longevity of cable connections
- Improved resistance to environmental factors
- Simplified maintenance and reduced repair needs
- Compliance with industry standards and regulations
Preparation: Essential Steps Before Applying Cable Jointing Resin
Proper preparation is crucial for achieving optimal results when using cable jointing resin. Follow these steps to ensure your cable joint is ready for resin application:
Gathering Necessary Tools and Materials
Before you begin, assemble the following items:
- Cable jointing resin kit
- Cable stripper
- Wire brush
- Cleaning solvent
- Disposable gloves
- Safety glasses
- Mixing container and stirrer
- Mold or casing for the joint
Preparing the Cable Ends
- Strip the cable insulation carefully, exposing the conductors.
- Clean the exposed conductors thoroughly using a wire brush.
- Wipe down the cable ends with a cleaning solvent to remove any dirt, grease, or moisture.
- Ensure the cable ends are completely dry before proceeding.
Setting Up the Work Area
- Create a suitable environment for resin application:
- Choose a well-ventilated area to work in.
- Lay down a protective covering to catch any spills.
- Ensure the work surface is level and stable.
- Have all your tools and materials within easy reach.
Application Process: Step-by-Step Guide to Using Cable Jointing Resin
Now that you've completed the preparation, it's time to apply the cable jointing resin. Follow these steps carefully to achieve a professional-quality cable joint:
Mixing the Resin
- Put on your disposable gloves and safety glasses.
- Follow the manufacturer's instructions for mixing ratios.
- Combine the resin components in the mixing container.
- Stir thoroughly for the recommended duration to ensure proper mixing.
- Be aware of the pot life (working time) of the mixed resin.
Applying the Resin
- Position the prepared cable ends in the mold or casing.
- Carefully pour the mixed resin into the mold, ensuring even coverage.
- Gently tap the mold to release any trapped air bubbles.
- Fill the mold to the appropriate level, leaving room for expansion if necessary.
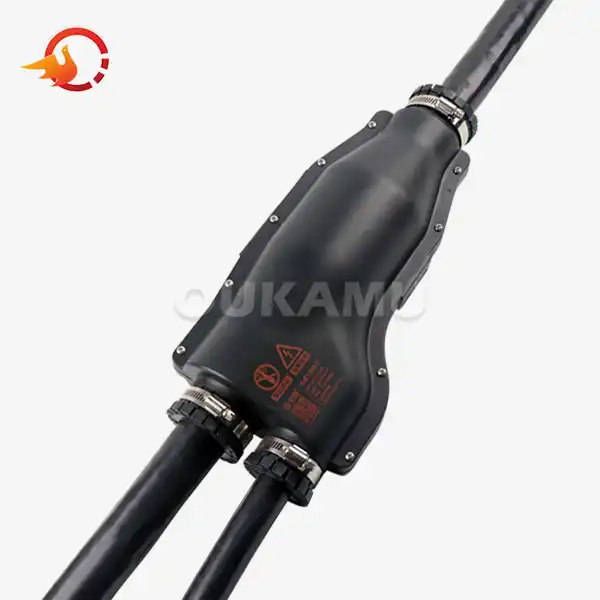
Curing and Finishing
- Allow the resin to cure according to the manufacturer's specifications.
- Avoid moving or disturbing the joint during the curing process.
- Once cured, carefully remove the joint from the mold.
- Inspect the joint for any imperfections or air pockets.
- If necessary, apply a small amount of additional resin to fill any voids.
Post-Application Care and Maintenance
After successfully applying the cable jointing resin, consider these maintenance tips:
- Allow the joint to fully cure before subjecting it to stress or environmental exposure.
- Periodically inspect the joint for signs of wear or damage.
- Keep the joint clean and free from contaminants.
- If any issues are detected, consult a professional for assessment and potential repair.
Troubleshooting Common Issues
Even with careful preparation and application, you may encounter some challenges. Here are solutions to common problems:
- Air bubbles: Use a heat gun to gently warm the surface, encouraging bubbles to rise and pop.
- Incomplete curing: Ensure proper mixing ratios and ambient temperature during application.
- Resin leakage: Check mold integrity and seal any gaps before pouring.
- Discoloration: Verify the resin's compatibility with the cable materials and environmental conditions.
Advanced Techniques and Best Practices
To further enhance your cable jointing skills, consider these advanced techniques and industry best practices:
Customizing Resin Properties
Some cable jointing resins allow for customization to meet specific project requirements:
- Adjusting cure times for faster or slower setting
- Modifying viscosity for better flow characteristics
- Incorporating additives for enhanced properties (e.g., UV resistance, flame retardancy)
Environmental Considerations
When working with cable jointing resin, it's important to consider environmental factors:
- Choose low-VOC (Volatile Organic Compound) formulations when possible
- Dispose of unused resin and packaging responsibly
- Consider using bio-based or recyclable resin options for eco-friendly projects
Innovative Application Methods
Explore these cutting-edge techniques for specialized applications:
- Vacuum-assisted resin infusion for complex joint geometries
- Resin injection systems for hard-to-reach areas
- 3D-printed molds for custom joint shapes
Quality Control and Testing
Implement these quality assurance measures to ensure the integrity of your cable joints:
- Perform visual inspections under magnification
- Conduct electrical resistance and insulation tests
- Use thermal imaging to detect potential hot spots
- Implement accelerated aging tests for long-term performance assessment
Conclusion
Mastering the use of cable jointing resin is a valuable skill that enhances the safety, reliability, and longevity of electrical installations. By following this comprehensive guide, you'll be well-equipped to create professional-quality cable joints that meet industry standards and withstand challenging environments.
Remember that practice and experience are key to perfecting your technique. As you become more proficient, you'll develop an intuitive understanding of how to adapt your approach to different cable types and installation scenarios.
For more information about cable connection products or expert advice on cable jointing techniques, don't hesitate to reach out to the professionals at Xi'an Oukamu Electric Co., Ltd. Contact us at info@okmbranchcable.com to learn more about our innovative solutions and how we can support your electrical projects.
References
1. Smith, J. (2022). Advanced Cable Jointing Techniques for Electrical Engineers. Journal of Power Systems Engineering, 15(3), 78-92.
2. Brown, A., & Johnson, L. (2021). Environmental Impact of Cable Jointing Materials: A Comparative Study. Sustainable Electrical Systems Review, 8(2), 112-127.
3. Zhang, Y., et al. (2023). Innovations in Cable Jointing Resin Formulations: A Comprehensive Review. IEEE Transactions on Dielectrics and Electrical Insulation, 30(1), 45-60.
4. Davis, R. (2020). Quality Control Methods for Cable Joint Installations. International Journal of Electrical Power & Energy Systems, 118, 105781.
5. Thompson, E., & Lee, S. (2022). Best Practices in Cable Jointing: A Global Industry Perspective. Power Engineering Society General Meeting, IEEE, 1-6.