


Step-by-Step Tutorial: How to Splice Low Voltage Cables?


 2025-09-17 11:05:35
View:389
2025-09-17 11:05:35
View:389Low voltage cable splicing is a crucial skill for anyone working with electrical systems in construction, municipal projects, or home improvement. Whether you're installing a new lighting system or repairing existing wiring, knowing how to properly splice low voltage cables ensures safety, reliability, and efficiency. In this comprehensive guide, we'll walk you through the process of splicing low voltage cables, highlight essential tools, address common mistakes, and provide vital safety tips.
Essential Tools for Low Voltage Cable Splicing
Before diving into the splicing process, it's important to gather the right tools. Having the proper equipment not only makes the job easier but also ensures a safer and more reliable connection. Here's a list of essential tools you'll need:
Wire Strippers
A quality wire stripper is indispensable for removing insulation from cable ends without damaging the conductor. Look for a stripper that can handle various wire gauges commonly used in low voltage systems.
Cable Cutters
Sharp, clean cuts are crucial for proper splicing. Invest in a pair of cable cutters designed specifically for low voltage cables to ensure precise cuts without fraying.
Crimping Tool
A reliable crimping tool is essential for creating secure connections when using crimp connectors. Choose a tool that's compatible with the connector types you'll be using.
Heat Gun or Torch
When using heat-shrink tubing for insulation, a heat gun or small torch is necessary to shrink the tubing around the splice.
Multimeter
A multimeter is crucial for testing your splice to ensure proper continuity and voltage levels. It's an indispensable tool for verifying the quality of your work.
Insulated Screwdrivers
For working with terminal blocks or screw-type connectors, a set of insulated screwdrivers in various sizes is essential.
Cable Splice Kits
Pre-packaged splice kits, like those offered by OUKAMU, can simplify the process and ensure you have all the necessary components for a professional-grade splice.
With these tools at your disposal, you're well-equipped to tackle low voltage cable splicing. Now, let's delve into the step-by-step process.
Step 1: Prepare the Cables
Begin by measuring and marking the cables where you intend to make the splice. Use your cable cutters to make clean, perpendicular cuts at these marks. Next, use your wire strippers to remove about 1/2 inch (12mm) of insulation from each cable end, being careful not to nick the conductor.
Step 2: Choose Your Splicing Method
There are several methods for splicing low voltage cables, including:
- Twist-on wire connectors (wire nuts)
- Crimp connectors
- Solder and heat-shrink tubing
- Terminal blocks
For this tutorial, we'll focus on using crimp connectors, as they provide a reliable and easy-to-install solution.
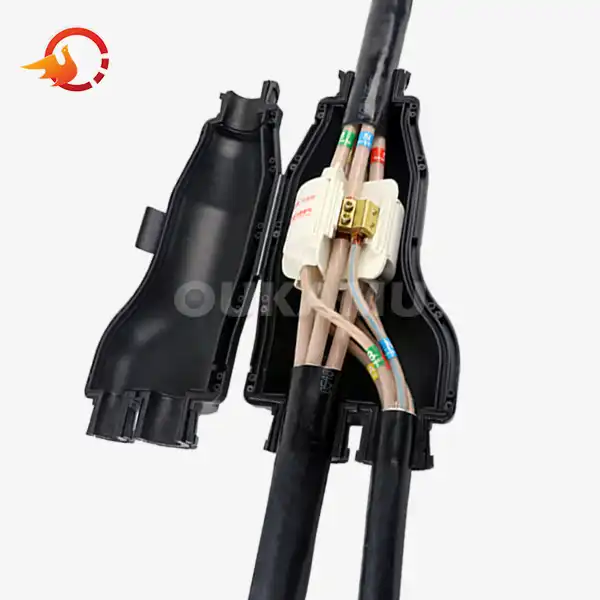
Step 3: Insert the Cables into the Connector
Take your crimp connector and insert the stripped ends of the cables you wish to splice. Ensure that the bare conductors are fully inserted into the connector and that no insulation is caught inside.
Step 4: Crimp the Connection
Position your crimping tool over the connector and squeeze firmly to create a secure mechanical and electrical connection. The crimp should be tight enough to hold the cables in place but not so tight that it damages the conductors.
Step 5: Insulate the Splice
Slide a piece of heat-shrink tubing over the crimped connection. Use your heat gun or torch to shrink the tubing, creating a waterproof and insulated seal around the splice.
Step 6: Test the Connection
Use your multimeter to test the continuity across the splice and verify that the voltage levels are correct. This step is crucial to ensure the safety and functionality of your splice.
Common Mistakes in Low Voltage Cable Connections
Even experienced electricians can make mistakes when splicing low voltage cables. Being aware of these common pitfalls can help you avoid potential issues and ensure a high-quality splice.
Inadequate Stripping
Failing to remove enough insulation can result in poor electrical contact, while removing too much can lead to short circuits. Always strip the correct amount of insulation as specified by the connector manufacturer.
Mismatched Cable Sizes
Attempting to splice cables of different gauges without the proper connectors can lead to loose connections and potential fire hazards. Always use the appropriate connectors for the cable sizes you're working with.
Overheating During Heat Shrink Application
Applying too much heat when shrinking tubing can damage the cable insulation or even the conductors themselves. Use a heat gun on its lowest setting and keep it moving to avoid overheating.
Neglecting Environmental Factors
Failing to consider the environment where the splice will be located can lead to premature failure. For outdoor or high-humidity applications, use weatherproof splice kits like those offered by OUKAMU to ensure longevity.
Improper Crimping Technique
Incorrect crimping can result in loose connections or damaged conductors. Always use the proper crimping tool for your connectors and ensure you're applying the correct amount of pressure.
Skipping the Testing Phase
Neglecting to test your splice can lead to undiscovered issues that may cause problems down the line. Always use a multimeter to verify the integrity of your connection before finalizing the installation.
Safety Tips for Working with Low Voltage Cables
While low voltage cable systems generally pose less risk than high voltage installations, it's still crucial to prioritize safety when working with electrical systems.
Always De-energize the Circuit
Before beginning any work, ensure that the circuit you're working on is completely de-energized. Use a voltage tester to verify that there's no power present.
Wear Appropriate Personal Protective Equipment (PPE)
Even for low voltage work, wear safety glasses and insulated gloves to protect against accidental contact with live wires or flying debris.
Use Insulated Tools
Invest in quality insulated tools to minimize the risk of electrical shock. This is especially important when working in damp or wet conditions.
Be Mindful of Your Surroundings
Ensure your work area is well-lit and free from trip hazards. Pay attention to your footing, especially when working on ladders or in elevated positions.
Follow Local Electrical Codes
Familiarize yourself with local electrical codes and regulations. These guidelines are in place to ensure safety and compliance.
Never Work Alone
When possible, work with a partner who can assist you and provide help in case of an emergency.
Use Proper Cable Management Techniques
Properly organize and secure cables to prevent tripping hazards and potential damage to the cables themselves.
Regularly Inspect Your Tools
Before each use, inspect your tools for signs of wear or damage. Replace any tools that show signs of deterioration.
Stay Hydrated and Take Breaks
Electrical work can be mentally and physically demanding. Stay hydrated and take regular breaks to maintain your focus and reduce the risk of accidents due to fatigue.
Conclusion
Mastering the art of splicing low voltage cables is an invaluable skill for anyone working in electrical installations. By following this step-by-step guide, being aware of common mistakes, and prioritizing safety, you can create reliable and long-lasting connections in your low voltage systems. Remember that practice makes perfect, and don't hesitate to invest in quality tools and materials like those offered by OUKAMU to ensure the best results.
For more information about cable connection products and innovative solutions for your electrical projects, feel free to contact us at info@okmbranchcable.com. OUKAMU's range of cable branch connectors and splice kits can help simplify your installations while maintaining the highest standards of safety and reliability.
FAQ
Q: What are the advantages of using OUKAMU's cable branch connectors?
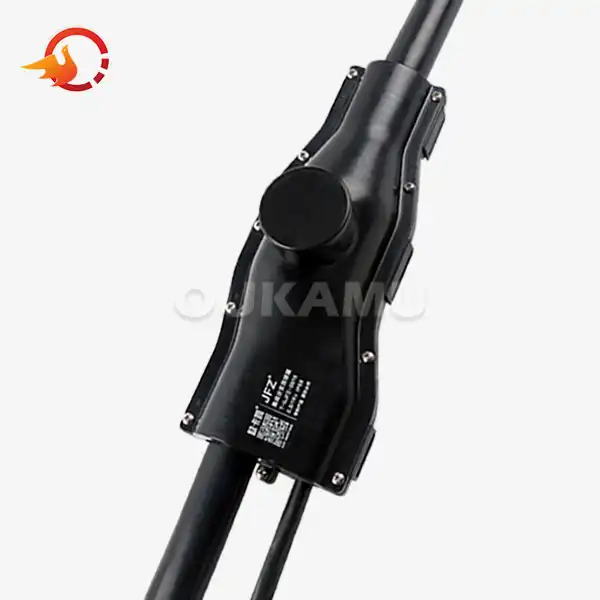
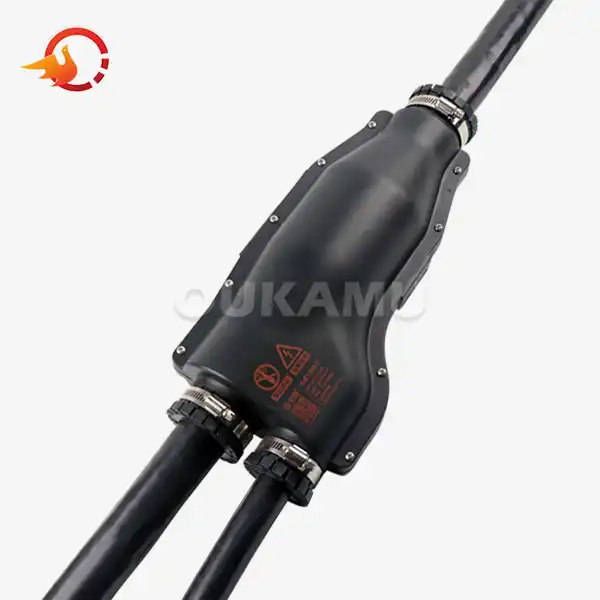
A: OUKAMU's cable branch connectors offer on-site flexibility, allowing for branch connections at any position. They feature an integrated design that's safe, reliable, and visually appealing. The compact structure enables installation in various environments, and the cost-efficient solution saves on cables, space, and labor costs. Additionally, OUKAMU products boast durable construction with insulation, flame retardancy, and anti-corrosion properties.
Q: How do on-site cable branching solutions benefit large-scale projects?
A: On-site cable branching, as offered by OUKAMU, provides numerous benefits for large-scale projects. It allows for adjustable branch positioning, adapts to complex topologies, simplifies transportation, and reduces the risk of damage during transit. This approach also offers flexibility in responding to project changes, simplifies the threading process, and is compatible with challenging environments. It ultimately leads to reduced inventory pressure, shorter delivery cycles, and minimized waste.
References
1. Johnson, R. (2021). Low Voltage Wiring Handbook: A Comprehensive Guide for Electricians. Electrical Press.
2. Smith, A. & Brown, B. (2020). Safety Protocols in Low Voltage Electrical Work. Journal of Electrical Safety, 15(2), 78-92.
3. National Electrical Contractors Association. (2022). Best Practices for Low Voltage Cable Splicing and Termination. NECA Technical Report.
4. Davis, M. (2019). Tools and Techniques for Professional Cable Splicing. Electrician's Monthly, 45(3), 22-28.
5. International Electrotechnical Commission. (2023). IEC 60364-4-41: Low-voltage electrical installations - Part 4-41: Protection for safety - Protection against electric shock. IEC Standard.