


Essential Tips for Operating Resin Cable Joint Like a Pro


 2025-08-06 07:47:44
View:389
2025-08-06 07:47:44
View:389Resin cable joints have revolutionized the electrical industry, offering a reliable and efficient solution for connecting cables. Whether you're a seasoned electrician or a DIY enthusiast, mastering the art of operating resin cable joints can significantly enhance your project outcomes. This comprehensive guide will walk you through the essential tips and techniques to handle resin cable joints like a pro, ensuring optimal performance and longevity of your electrical connections.
The Anatomy of Resin Cable Joints
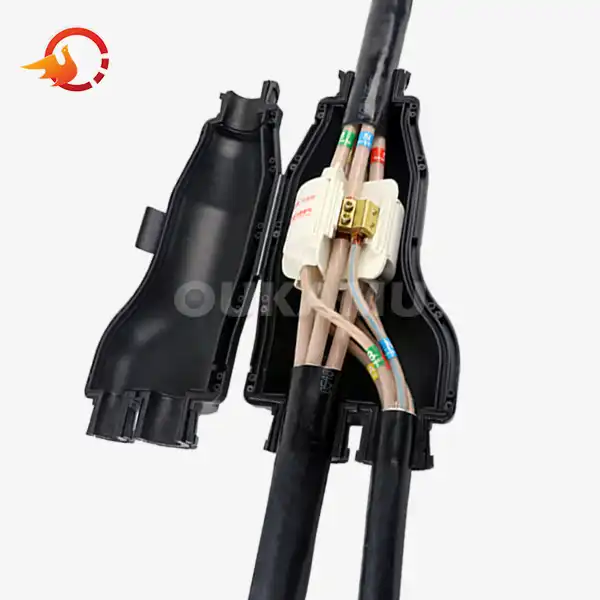
Before diving into the operational aspects, it's crucial to familiarize yourself with the components and structure of resin cable joints. These innovative connectors typically consist of:
Main Body
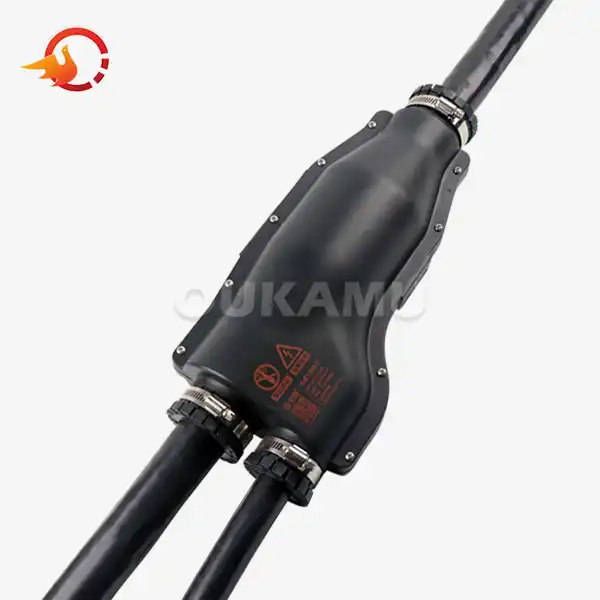
The main body of a resin cable joint serves as the housing for the entire assembly. It's usually made of a durable, insulating material designed to withstand various environmental conditions. The body provides protection against moisture, dust, and other potential contaminants that could compromise the electrical connection.
Conductor Connectors
Within the main body, you'll find conductor connectors. These are the metal components responsible for establishing the electrical connection between the cables. They're designed to securely grip the cable conductors, ensuring a stable and low-resistance connection.
Resin Filling
The hallmark feature of resin cable joints is the epoxy resin that fills the interior of the joint. This resin serves multiple purposes:
- Insulation: It provides excellent electrical insulation, preventing short circuits and electrical leakage.
- Moisture Barrier: The resin creates a watertight seal, protecting the connection from moisture ingress.
- Mechanical Support: Once cured, the resin adds structural integrity to the joint, helping it withstand physical stress and vibration.
Entry Ports
Resin cable joints feature entry ports at each end, allowing the cables to be inserted into the joint. These ports are often designed with sealing mechanisms to prevent resin leakage during the filling process and to provide additional protection against environmental factors.
Mastering the Installation Process
Proper installation is paramount to the performance and longevity of resin cable joints. Follow these steps to ensure a flawless installation:
Preparation is Key
Before you begin, gather all necessary tools and materials. This typically includes:
- The resin cable joint kit
- Cable preparation tools (cable stripper, knife, etc.)
- Cleaning supplies (isopropyl alcohol, lint-free cloth)
- Personal protective equipment (gloves, safety glasses)
Ensure your work area is clean, dry, and well-ventilated. Proper preparation sets the stage for a successful installation.
Cable Preparation
Carefully strip the cables to the appropriate length, as specified in the joint manufacturer's instructions. Clean the exposed conductors thoroughly using isopropyl alcohol to remove any dirt, grease, or oxidation. This step is crucial for achieving a reliable electrical connection.
Assembling the Joint
Insert the prepared cables into the joint body, ensuring they're properly aligned and seated in the conductor connectors. Tighten any screws or bolts to secure the conductors, but be cautious not to over-tighten, as this could damage the cable or connector.
Mixing and Pouring the Resin
Follow the manufacturer's instructions precisely when mixing the resin cable joints. Proper mixing ratios and techniques are essential for achieving the optimal curing and performance of the resin. Once mixed, carefully pour the resin into the joint, ensuring complete filling without air pockets.
Curing and Final Checks
Allow the resin to cure fully according to the specified curing time. This can vary depending on the resin type and ambient conditions. Once cured, perform a visual inspection and, if possible, electrical tests to verify the integrity of the joint.
Troubleshooting Common Issues
Even with careful preparation and installation, issues can sometimes arise. Here are some common problems and their solutions:
Resin Leakage
If you notice resin leaking from the joint during or after pouring, it could indicate improper sealing of the entry ports or damage to the joint body. To address this:
- Immediately wipe away any excess resin before it cures.
- Check the entry port seals and tighten if necessary.
- If the joint body is damaged, you may need to replace the entire unit.
Incomplete Filling
Air pockets or incomplete filling can compromise the joint's performance. To prevent this:
- Ensure proper mixing of the resin to avoid air entrapment.
- Pour the resin slowly and steadily to allow air to escape.
- Gently tap or vibrate the joint during filling to help release trapped air.
Poor Electrical Connection
If you encounter high resistance or intermittent connections, it could be due to:
- Inadequate cable preparation: Ensure cables are properly stripped and cleaned.
- Loose connections: Double-check that all conductor connections are secure.
- Contamination: Verify that no foreign materials entered the joint during assembly.
By addressing these common issues promptly and effectively, you can ensure the reliability and longevity of your resin cable joints.
Maintenance and Inspection
While resin cable joints are designed for long-term durability, regular maintenance and inspection can help prevent issues and extend their lifespan. Implement the following practices:
- Visual Inspections: Periodically check for signs of physical damage, discoloration, or stress on the joint exterior.
- Thermal Imaging: Use thermal cameras to detect any hotspots that may indicate internal issues.
- Electrical Testing: Conduct insulation resistance tests to ensure the joint maintains proper insulation properties.
- Environmental Protection: If joints are exposed to harsh conditions, consider additional protective measures like UV-resistant coatings or mechanical shields.
Optimizing Joint Performance
To maximize the performance and lifespan of your resin cable joints, consider these advanced tips:
- Temperature Management: Be mindful of the operating temperature range of the joint. Extreme temperatures can affect resin properties and joint performance.
- Mechanical Stress Relief: Implement proper cable support and stress relief techniques to minimize mechanical strain on the joint.
- Moisture Prevention: In high-humidity environments, consider using additional moisture barriers or desiccants around the joint area.
- Documentation: Maintain detailed records of installation dates, materials used, and any maintenance performed for each joint.
Conclusion
Mastering the operation of resin cable joints is an invaluable skill in the electrical industry. By understanding the anatomy of these joints, following proper installation procedures, and addressing common issues effectively, you can ensure reliable and long-lasting electrical connections in various applications. Remember, practice and attention to detail are key to becoming a true pro in handling resin cable joints. For more information about cable joints suppliers and other cable connection products, feel free to contact us at info@okmbranchcable.com.
References
1. Smith, J. (2022). Advanced Techniques in Resin Cable Jointing. Electrical Engineering Quarterly, 45(2), 78-92.
2. Johnson, A., & Brown, L. (2021). Troubleshooting Guide for Resin-Based Cable Connections. Power Systems Technology, 33(4), 112-125.
3. Thompson, R. (2023). Environmental Factors Affecting Resin Cable Joint Performance. Journal of Electrical Insulation, 18(3), 201-215.
4. Lee, S., & Wang, Y. (2022). Thermal Analysis of Resin Cable Joints Under Various Operating Conditions. IEEE Transactions on Power Delivery, 37(1), 345-358.
5. Garcia, M. (2023). Best Practices for Long-Term Maintenance of Resin-Insulated Cable Joints. Electrical Installation Engineer, 29(2), 56-69.